

Create tests
The Tests tab browses the project’s suites and lets you add test cases without leaving the panel — by title alone, or written out in the editor.
Browse
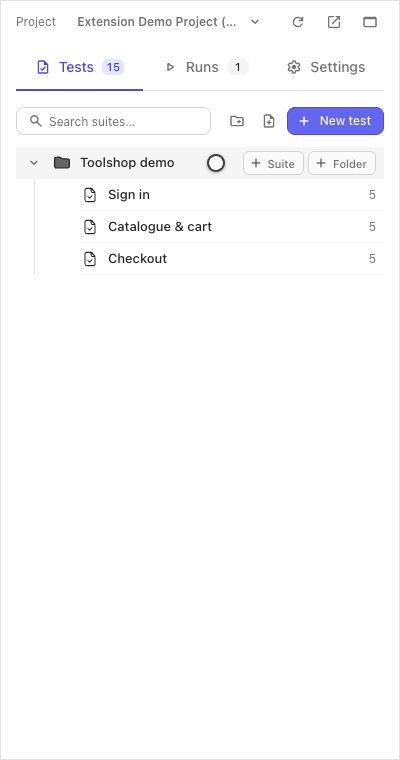
Section titled “Browse”The tab shows the suite tree with test counts. Folders group suites; clicking a suite opens its test list; clicking a test opens it — an existing case renders read-only until you choose to edit.
Add by title
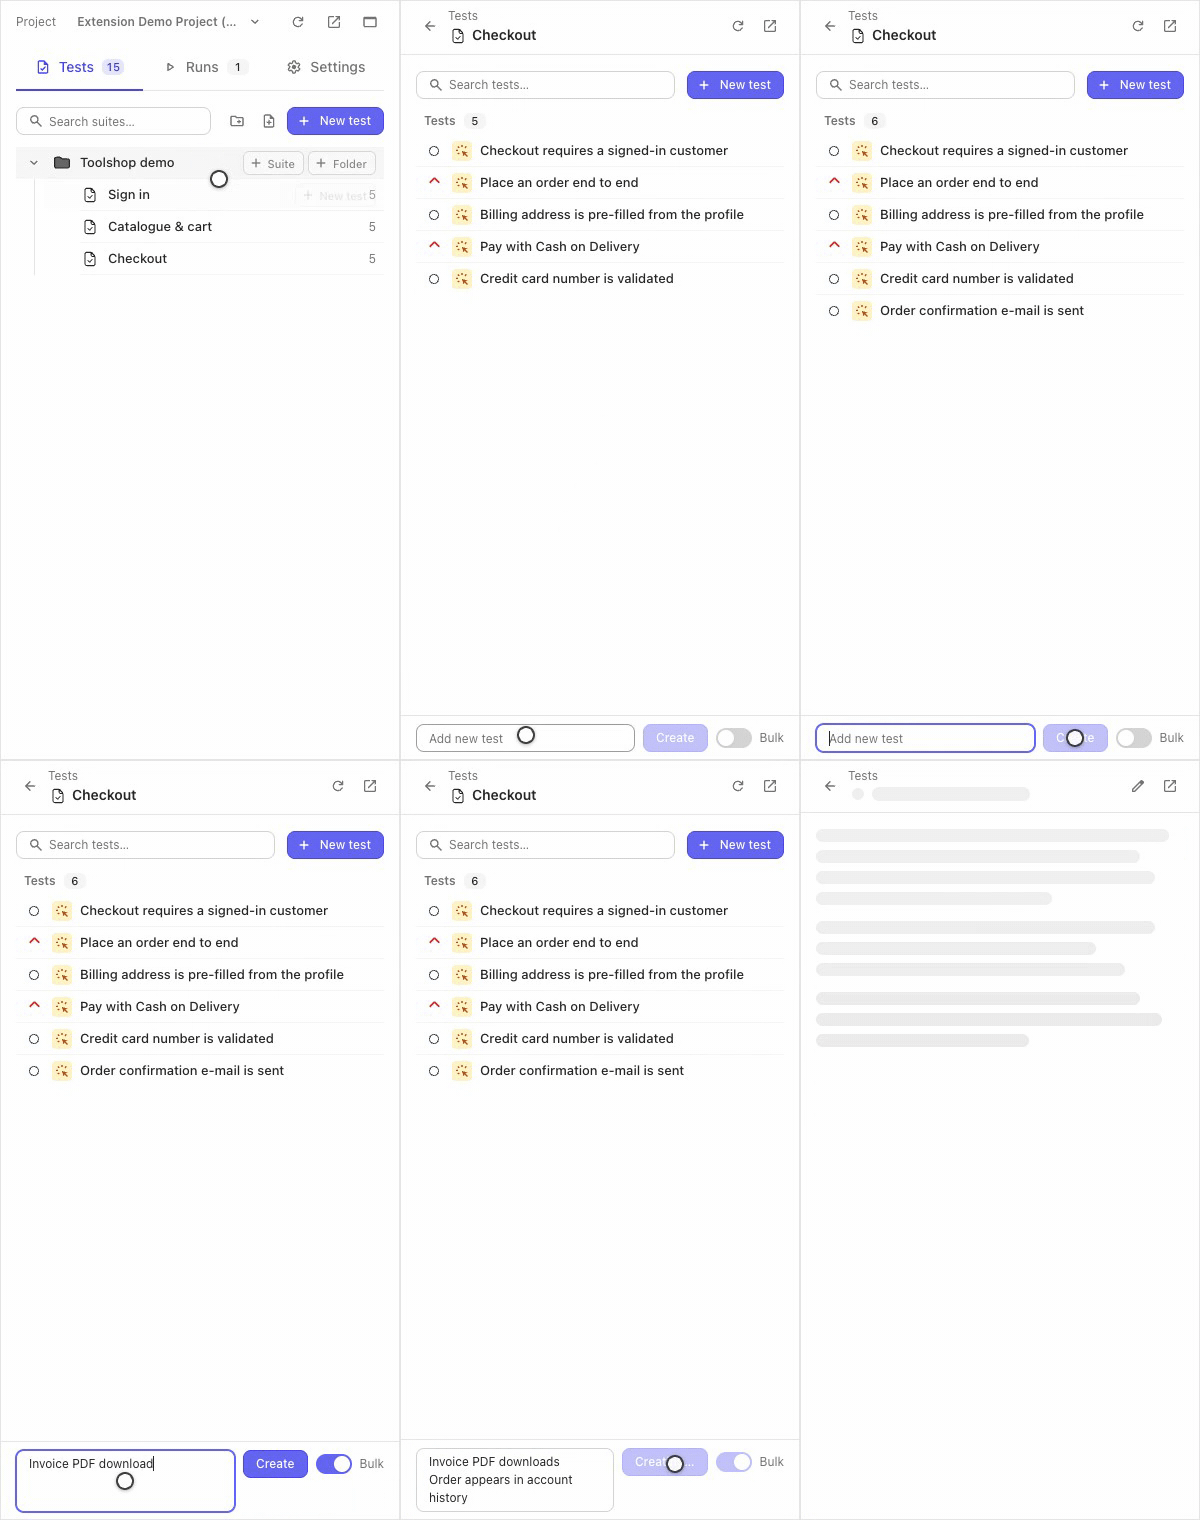
Section titled “Add by title”Open a suite. The bar at the bottom adds a test right here:
- Type the title into Add new test, press Create (or Enter) — the case appears in the list, empty for now.
- Flip Bulk and the field becomes a list — one title per line, one press, the whole list is created in order.
Bulk add needs the full (not basic) mode.
Write it out in the editor
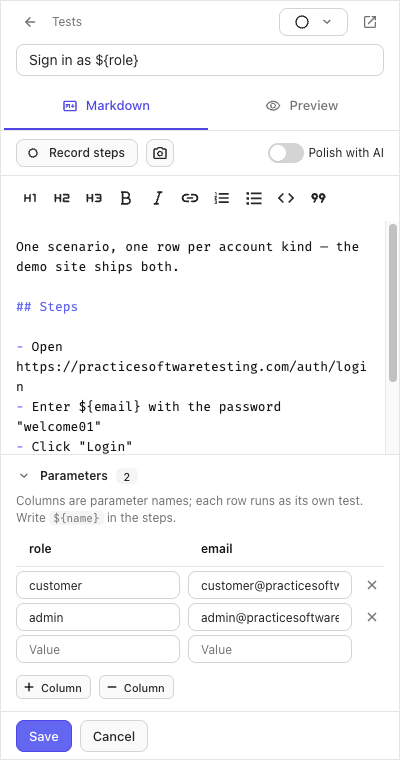
Section titled “Write it out in the editor”New test opens the editor: the title, a Markdown body with live preview, and a suite picker if you started from the tree root. Steps are plain Markdown lists; the toolbar records steps for you (see Step recorder) and can hand the draft to your Testomat.io AI to be rewritten — with an Undo.
New suites and folders are made from the tree’s own + buttons.
Parameters
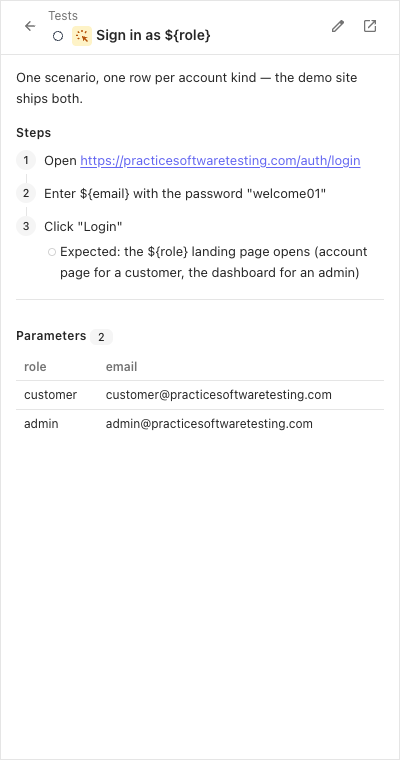
Section titled “Parameters”A test that should run once per data row gets parameters — edited in the same editor:
- Name the columns (say
role,email). - Fill one example row per variant.
- Write
${role}and${email}in the title or steps.
In a run, such a test shows one row per example, each marked on its own.
If it didn’t work
Section titled “If it didn’t work”- Create is greyed out — the title is empty, or the panel is in basic mode (bulk add and the editor’s server features need the session).
${name}shows literally in a run — the test has no example rows yet; add at least one in the editor’s Parameters.- A new test is not in the web app yet — give the panel a moment or press Refresh there; the panel writes through the same API the web reads.